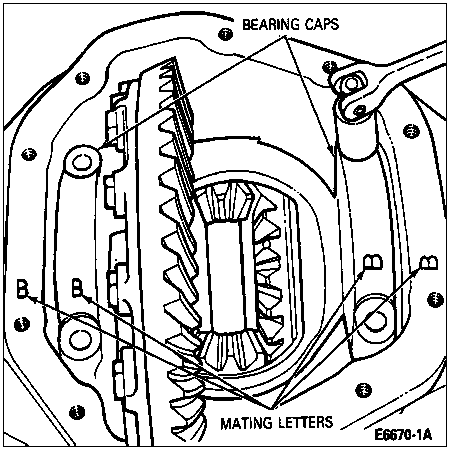
NOTE: Mating letters are stamped on bearing caps and carrier. Letters are in vertical and horizontal positions. Note the letter positions before removal. At time of assembly they are to be assembled exactly as removed.
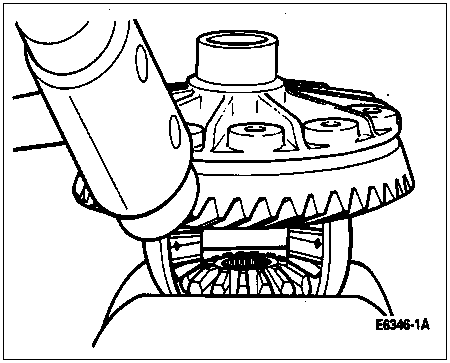
Loosen capscrews and remove bearing caps.
Differential Assembly
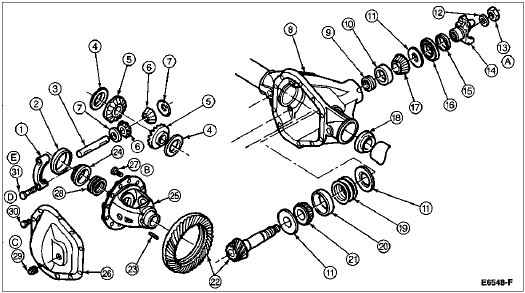
| Item | Part Number | Description |
|---|---|---|
| 1 | — | Bearing Cap (Part of 3010) |
| 2 | 4222 | Differential Bearing Cup |
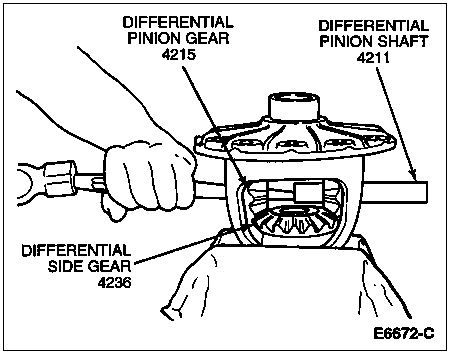
| 3 | 4211 | Differential Pinion Shaft |
| 4 | 4228 | Differential Side Gear Thrust Washer |
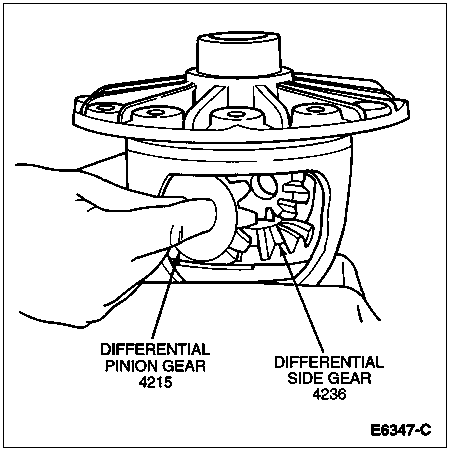
| 5 | 4236 | Differential Side Gear |
| 6 | 4215 | Differential Pinion Gear |
| 7 | 4230 | Differential Pinion Thrust Washer |
| 8 | — | Carrier (Part of 3010) |
| 9 | 4109 | Preload Shims |
| 10 | 4616 | Differential Drive Pinion Bearing Cup |
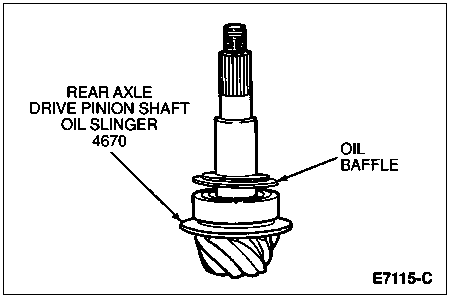
| 11 | 4670 | Front Axle Pinion Shaft Oil Slinger |
| 12 | 372632-S | Washer |
| 13 | 354845-38 | Nut |
| 14 | 4851 | Front Axle Universal Joint Flange |
| 15 | 4859 | Drive Pinion Oil Seal Deflector |
| 16 | 4676 | Front Axle Drive Pinon Seal |
| 17 | 4621 | Differential Pinion Bearing |
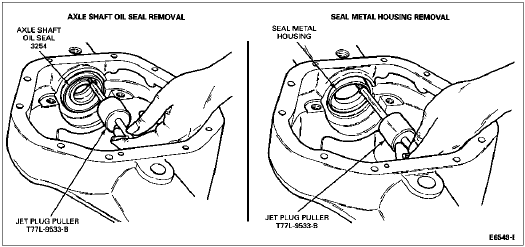
| 18 | 3254 | Axle Shaft Oil Seal |
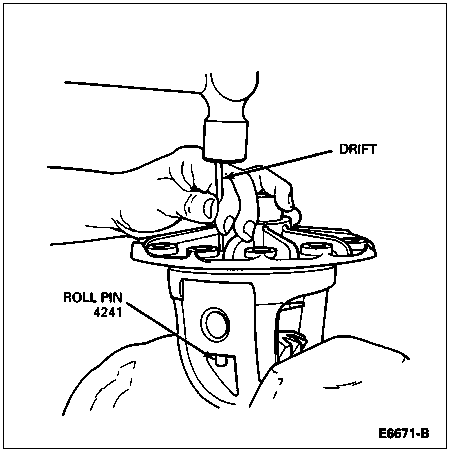
| 19 | 4672 | Drive Pinion Shims |
| 20 | 4628 | Front Axle Pinion Bearing Cup |
| 21 | 4630 | Differential Pinion Bearing |
| 22 | 3222 | Ring Gear and Pinion |
| 23 | 4241 | Differential Pinion Shaft Lock Pin |
| 24 | 1244 | Differential Bearing |
| 25 | 4204 | Differential Case |
| 26 | 4033 | Axle Housing Cover |
| 27 | 350672-S | Bolt |
| 28 | 4067 | Differential Bearing Shim |
| 29 | 853051-S | Fill Plug |
| 30 | 3C323 | Bolt |
| 31 | 355765-S | Bolt |
| A | — | Tighten to 298-379 Nm (220-280 Lb-Ft) |
| B | — | Tighten to 136-172 Nm (100-120 Lb-Ft) for Grade 9. For Grade 9 (C7 Lines on Bolt Head), Tighten to 176-190 Nm (130-140 Lb-Ft) |
| C | — | Tighten to 28-34 Nm (21-25 Lb-Ft) |
| D | — | Tighten to 41-54 Nm (30-40 Lb-Ft) |
| E | — | Tighten to 109-122 Nm (80-90 Lb-Ft) |