Section 07-01: Transmission, Automatic, E4OD | 1997 F-250 Heavy Duty, F-350 and F-Super Duty Workshop Manual |
NOTE: If the transmission (7003) has been disassembled to replace worn or damaged parts and the valves in the main control valve body (7A100) stick repeatedly from foreign material, the torque converter (7902) must be removed and cleaned by using a mechanically agitated cleaner, such as Rotunda Torque Converter/Oil Cooler Cleaner 014-00028 or equivalent.
Removal
Remove transmission fluid level indicator (7A020).
Raise and support vehicle.
Loosen the two transmission heat shield bolts using an 8 mm socket. Remove the transmission heat shield (7A434).
CAUTION: Do not attempt to pry tab with pry bar or screwdriver. Remove the transmission heat shield from the transmission before attempting to remove the connector.
NOTE: Check electrical connectors for terminal condition, corrosion and contamination. Repair or replace as required.
Disconnect solenoid body assembly harness connector by pushing on the center tab and pulling upward on the harness connector.
Position a drain pan under transmission.
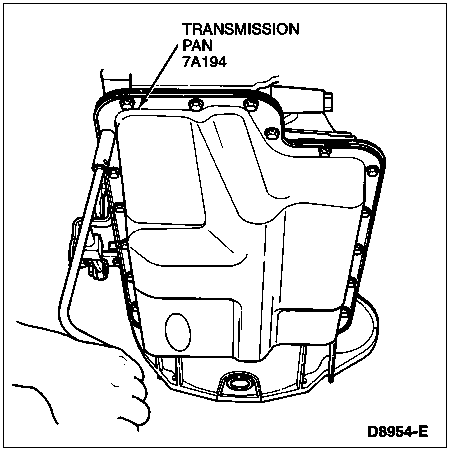
Remove all transmission pan bolts, except the front ones, using a 10 mm socket. Only loosen the front bolts at this time.
Lower the rear of the transmission pan down and allow the fluid to drain.
Remove front pan bolts and remove transmission pan.
CAUTION: Cork gaskets and elastomeric gaskets are not interchangeable. If you remove a cork gasket, replace it with a cork gasket. If you remove an elastomeric gasket, clean, inspect and reuse unless gasket is damaged. Be careful not to cut or bend elastomeric gasket.
Remove, but do not discard, reusable elastomeric transmission pan gasket.
CAUTION: Use care not to scratch or damage aluminum pump bore.
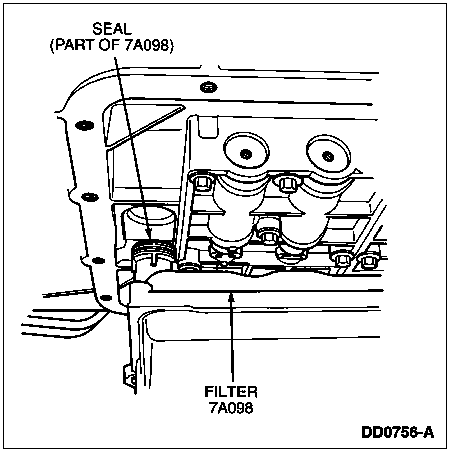
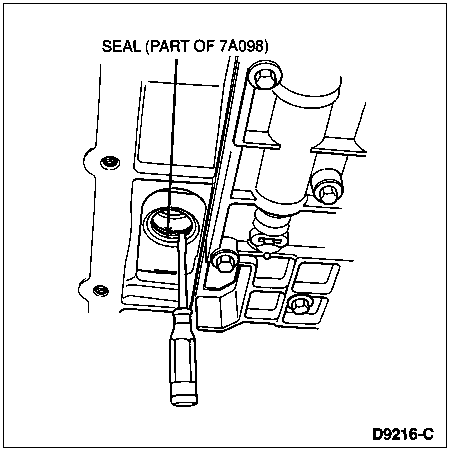
Remove filter assembly and seal by carefully pulling and rotating the filter as necessary. If seal remains in bore, carefully remove using a small screwdriver. Discard filter assembly and seal.
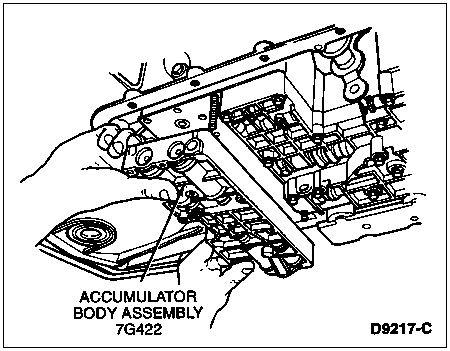
Remove 11 accumulator body bolts using an 8 mm socket and two nuts using a 10 mm socket. Remove accumulator body assembly.
If valve body separator plate (7A008) is to be left on the transmission, remove and install one of the reinforcing plate bolts into any of the case threaded bolt holes on the opposite end of the separator plate. This will prevent the valve body separator plate from sagging and displacing check balls.
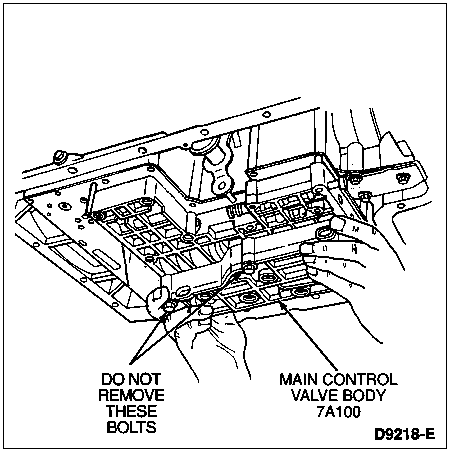
NOTE: Do not remove the two bolts as shown in the following illustration. This will keep the upper and lower main control valve bodies attached as an assembly.
Remove 14 main control valve body bolts using an 8 mm socket and two nuts using a 10 mm socket. Remove main control valve body.
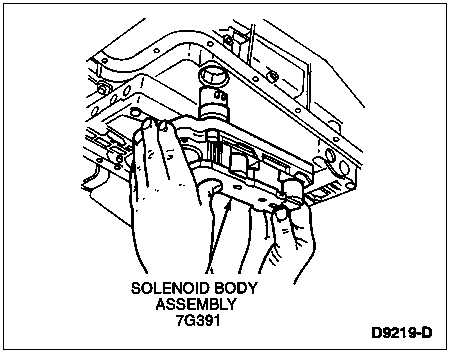
Remove nine solenoid body assembly bolts using a T30 Torx® bit and one nut using a 10 mm socket. Push down on solenoid body assembly receptacle to remove solenoid body assembly.
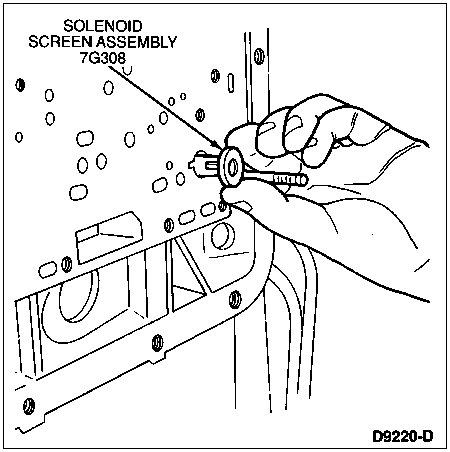
Remove solenoid screen assembly by rotating and pulling it out.
Remove separator plate reinforcing plate bolts using an 8 mm socket. Remove plate.
Lower valve body separator plate and gaskets carefully so that rubber check balls, steel EPC check ball and spring are retained.
Installation
Apply a light film of petroleum jelly to valve body separator plate to hold new valve body separator plate gasket.
Apply light film of petroleum jelly to valve body separator plate to hold new valve body separator plate to case gasket on valve body separator plate.
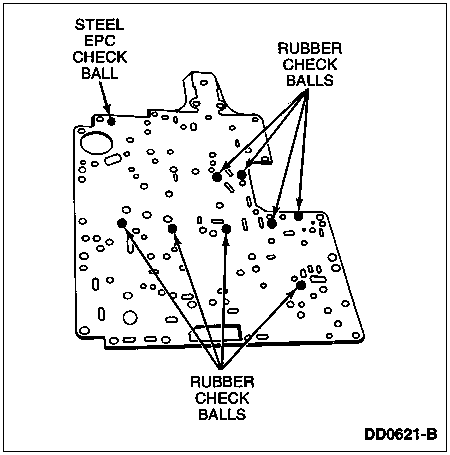
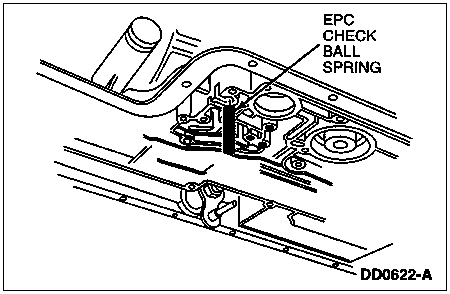
Place a small amount of petroleum jelly on each of the eight rubber check balls and the steel EPC check ball. Position balls on the valve body separator plate as shown.
Place a daub of petroleum jelly on the EPC check ball spring and install it into the location shown.
Position valve body separator plate and gaskets to case (7005) carefully, to retain check balls.
Install separator plate reinforcing plate using three separator plate reinforcing plate bolts. Tighten to 9-11 Nm (80-100 lb-in).
Install solenoid screen assembly and rotate to lock in place.
Install main control valve body over studs. Align manual shift valve with inner manual valve detent lever (7A115).
NOTE: If separator plate reinforcing plate bolt has been used to retain valve body separator plate to case, reinstall after main control valve body is attached.
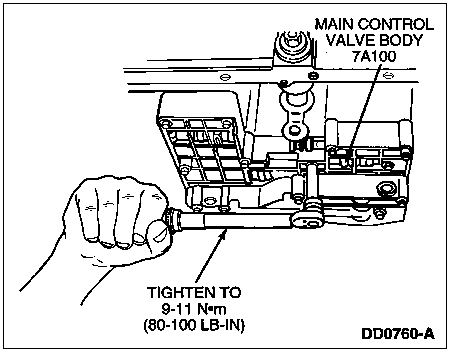
Attach main control valve body with two nuts using a 10 mm socket and 14 bolts using an 8 mm socket. Tighten to 9-11 Nm (80-100 lb-in).
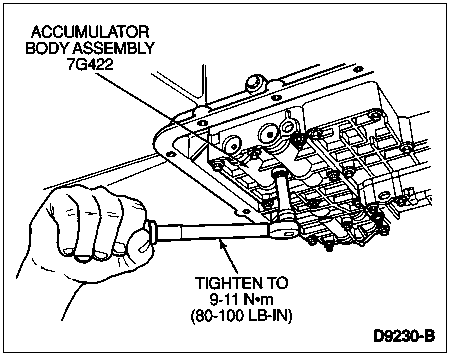
Install accumulator body assembly over studs and attach with two nuts using a 10 mm socket and 11 bolts using an 8 mm socket. Tighten to 9-11 Nm (80-100 lb-in).
NOTE: Prior to solenoid body assembly installation, coat the case connector bore with Silicone Brake Caliper Grease and Dielectric Compound D7AZ-19331-A (Motorcraft WA-10) or equivalent meeting Ford specification ESA-M1C171-A. Inspect solenoid body assembly electrical connector for proper seating and condition.
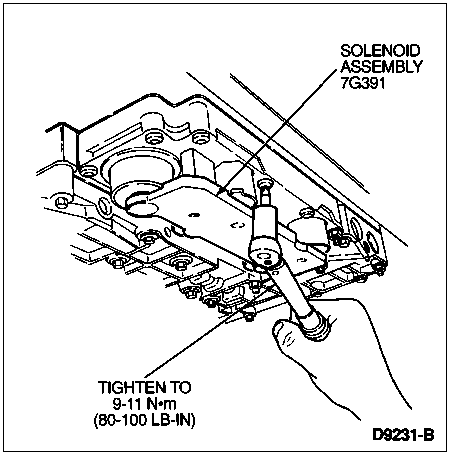
Install solenoid body assembly over stud and attach with nine Torx® bolts using a T30 bit and one nut using a 10 mm socket. Tighten to 9-11 Nm (80-100 lb-in).
CAUTION: Do not mix 4x4 and 4x2 transmission fluid filters and transmission pan assembly components. Transmission damage can result.
Select the appropriate style filter assembly and transmission pan for either 4x2 or 4x4 models.
Install a new filter assembly and seal by lubricating the seal with transmission fluid and pressing the filter into place. Do not reuse old filter or seal.
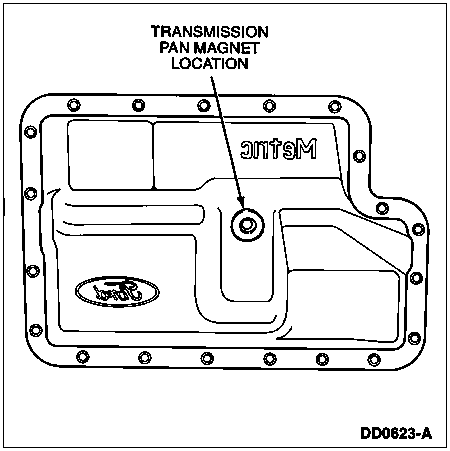
Check for correct placement of transmission pan magnet over dimple in transmission pan.
CAUTION: Cork gaskets and elastomeric gaskets are not interchangeable. If you remove a cork gasket, replace it with a cork gasket. If you remove an elastomeric gasket, clean, inspect and reuse unless gasket is damaged. Be careful not to cut or bend elastomeric gasket.
Clean, inspect and reuse elastomeric gasket unless damaged.
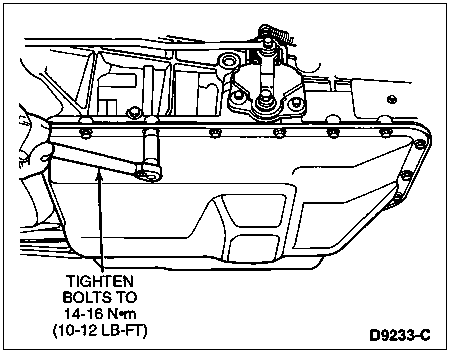
Install cleaned pan, gasket and pan bolts using a 10 mm socket. Tighten to 14-16 Nm (10-12 lb-ft).
Completely seat solenoid body connector into solenoid body assembly receptacle by pushing on top of connector. Audible click indicates full connection.
Install transmission heat shield with offset bending inward. Tighten bolts to 9-12 Nm (77-104 lb-in).
Lower vehicle.
Fill the transmission to the proper level with Motorcraft MERCON® Multi-Purpose Automatic Transmission Fluid XT-2-QDX or MERCON® equivalent. Refer to Fluid Capacity chart in the Specifications portion of this section.