Insert the tip of the Snap Ring Remover T89P-19623-DH into one of the snap ring eyes.
Section 12-03B: Compressor and Clutch, FS-10 | 1996 F-Series and Bronco Workshop Manual |
The refrigerant must be recovered and the A/C compressor (19703) must be removed from the vehicle prior to replacing the compressor shaft seal. Refer to Section 12-00.
| Description | Tool Number |
|---|---|
| Snap Ring Remover | T89P-19623-DH |
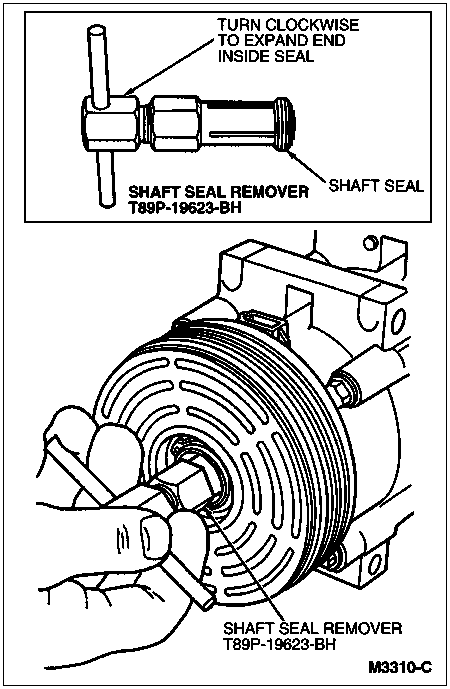
| Shaft Seal Remover | T89P-19623-BH |
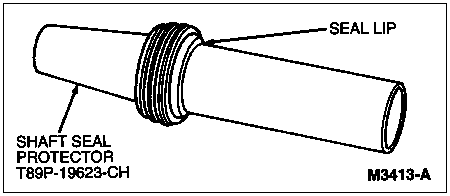
| Shaft Seal Protector | T89P-19623-CH |
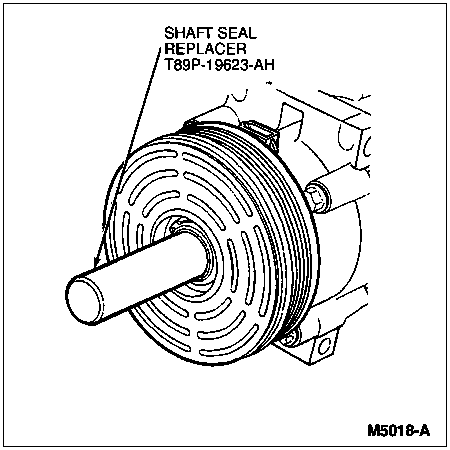
| Shaft Seal Replacer | T89P-19623-AH |
Removal
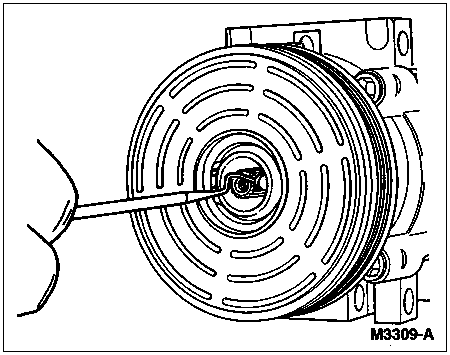
Remove clutch hub from A/C compressor.
Remove shaft seal felt from nose of compressor with a plastic toothpick or similar tool that will not scratch any surfaces.
Blow any debris from inside the compressor nose with low pressure compressed air. Then clean the inside and outside nose area of the A/C compressor with a lint free cloth to remove any oil and dirt.
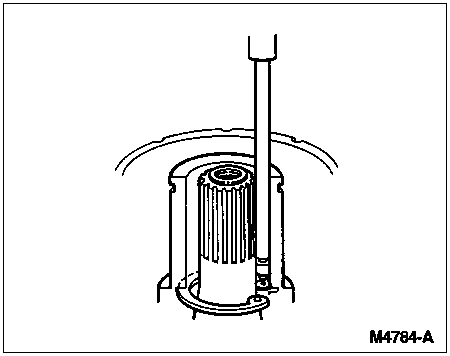
Remove shaft seal retaining snap ring from inside compressor nose with Snap Ring Remover T89P-19623-DH as described in the following steps. Refer to the following illustrations.
Insert the tip of the Snap Ring Remover T89P-19623-DH into one of the snap ring eyes.
Rotate the snap ring remover to position the tool tip and the snap ring eye closest to the compressor shaft.
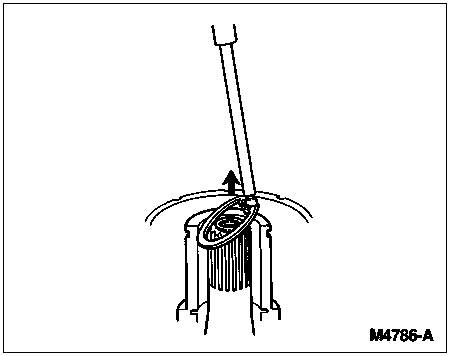
Pull the snap ring remover up quickly while keeping the tool shaft against the side of the nose opening and remove the snap ring.
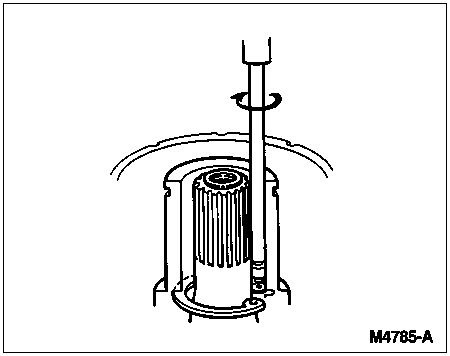
Position Shaft Seal Remover T89P-19623-BH over compressor shaft and push tool into nose of A/C compressor and down against shaft seal. Engage end of tool with internal diameter of shaft seal. While holding the hex part of the tool, turn tool handle clockwise to expand tool tip inside seal inner radius. Then, pull shaft seal from the A/C compressor with the tool.
Installation
Obtain a new Shaft Seal Kit (Basic Part No. 19D665). Carefully remove the contents of the kit from the package. A plastic shaft seal protector is included with each kit. Inspect the protector for any burrs or other damage. Do not use the protector if it is damaged. Obtain another shaft seal kit, if necessary, and use the protector from it.
![]() CAUTION: Do not allow any dirt or foreign materials to enter the A/C compressor.
CAUTION: Do not allow any dirt or foreign materials to enter the A/C compressor.
Using a clean lint free cloth, clean the compressor shaft and the seal pocket inside the compressor nose.
Dip Shaft Seal Protector T89P-19623-CH and shaft seal in clean refrigerant oil for R-134a Systems F2AZ-19577-AC (Motorcraft YN-12B) or equivalent meeting Ford specification WSH-M1C231-B. Position the shaft seal on the protector with the lip of the seal pointing toward the large end of the protector.
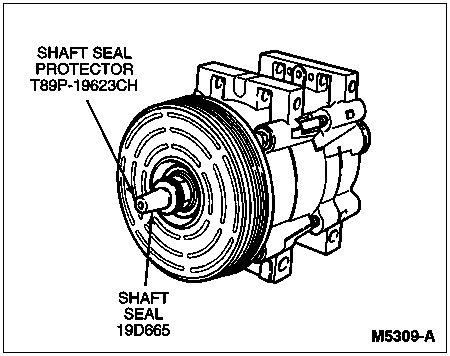
Place the shaft seal protector with shaft seal over the end of the compressor shaft.
Using Shaft Seal Replacer T89P-19623-AH, slowly push seal down shaft protector onto compressor shaft until seated.
Remove installer tool and shaft protector from compressor shaft.
Place a new shaft seal retaining snap ring into the compressor nose opening and seat the snap ring into the groove.
Leak test the shaft seal installation after rotating the compressor shaft about ten revolutions with the clutch hub. Refer to Section 12-00.
Install a new shaft seal felt in nose of A/C compressor.
Install clutch hub on A/C compressor.
Check and adjust the air gap as necessary. Refer to A/C Clutch Air Gap in the Adjustments portion of this section.