Pry the vacuum control motor and arm assembly upward at the arm end to free it from its mounting peg. A retaining flange that is an integral part of the crank, peg, and flange component may partially obstruct the arm in its upward movement along the peg. If this retaining flange should break off when forcing the arm upward, a 3/16-inch spring nut (Part No. 383358-S) must be used to retain the arm when the same or replacement vacuum control motor is installed. The following illustration shows removal in View A and the area in which retainer flange breakage might occur in the main view.
Outside Air/Recirculation Air Door Vacuum Control Motor Installation
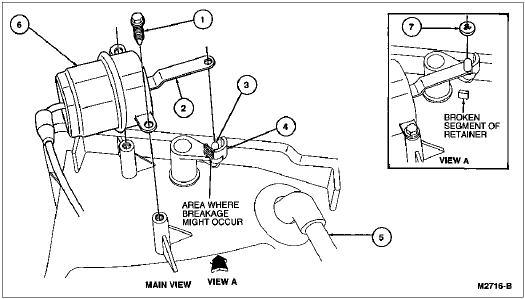
| Item | Part Number | Description |
|---|---|---|
| 1 | 39085-S2 | Screw (2 Req'd) |
| 2 | Ś | Motor Arm (Part of 18A318) |
| 3 | Ś | Peg (Part of Cam) |
| 4 | Ś | Retainer (Part of Cam) |
| 5 | Ś | Electrical Wiring Harness (Part of 14401) |
| 6 | 18A318 | Vacuum Control Motor |
| 7 | 383358-S | Spring Nut |