Section 07-01A: Transmission, Automatic, E4OD | 1996 All F-Series and Bronco with E4OD Automatic Transmission Workshop Manual |
Position the torque converter to the transmission by rotating and pushing it inward until full engagement is made. Lubricate the converter pilot hub using Ford Multi-Purpose Grease DOAZ-19584-AA (or equivalent).
CAUTION: Do not allow the torque converter drive flats to disengage from the pump gear.
NOTE: The torque converter must rest squarely against the flexplate. This indicates that the torque converter pilot is not binding in the engine crankshaft.
Position the transmission under the vehicle. Raise the transmission into position. Rotate the torque converter to align the converter studs with the flexplate mounting holes.
Install the lower transmission bolts.
Remove the engine support.
Slightly lower the transmission and install the remaining transmission-to-engine bolts (including the fuel line bracket). Tighten the bolts to 53-72 Nm (39-53 lb-ft).
Raise the transmission and install the crossmember. Install the transmission support crossmember bolts and nuts (upper, then lower outer, then inner) to the frame. Tighten the retainer to 68-95 Nm (50-70 lb-ft).
Lower the transmission and install the transmission support insulator nuts. Tighten the nuts to 80-110 Nm (59-81 lb-ft).
Item | Part Number | Description |
---|---|---|
1 | 6096 | Rear Engine Support Bracket (RH) |
2 | 6A023 | Transmission Support Crossmember |
3 | 60091 | Insulator and Retainer |
4 | 390066 | Screw and Washer |
5 | 6096 | Rear Engine Support Bracket (LH) |
6 | N621945 | Nut and Washer |
7 | N802114 | Bolt |
8 | N800937 | Nut |
A | — | Tighten to 68-95 Nm (50-70 Lb-Ft) |
B | — | Tighten to 68-95 Nm (50-70 Lb-Ft) |
Disconnect the E4OD adapter plate. Lower and remove the jack.
Install three transmission pan bolts and tighten them to 14-16 Nm (10-12 lb-ft).
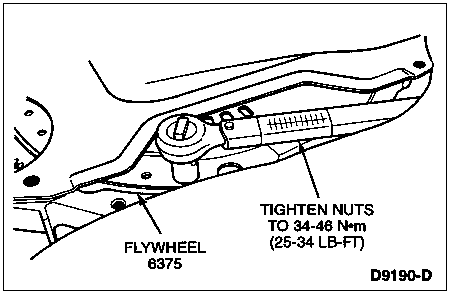
Install new torque converter-to-flexplate nuts. Tighten the nuts to 34-46 Nm (25-34 lb-ft).
Position the flexplate housing cover and install the bolts. Install the spacer plate-to-transmission bolt. Tighten the bolts to 18-23 Nm (13-17 lb-ft).
Position the starter motor and install the bolts. Tighten the bolts to 20-27 Nm (15-20 lb-ft).
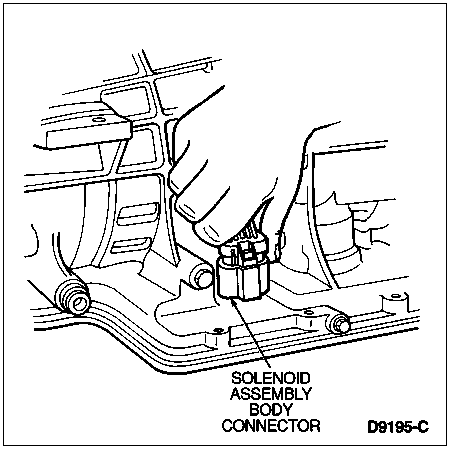
Position the transmission wiring harness over the transmission. Connect the TR sensor, E4OD solenoid body assembly, and HO2S connectors.
NOTE: The case fittings must be held with a wrench to prevent them from turning when tightening the tube nuts.
Remove the caps from the lines and fittings. Securely install the transmission cooler lines.
Install the transmission heat shield with the shield offset bend facing inboard and tighten the bolts. Tighten the bolts to 9-12 Nm (80-106 lb-in).
Install the shift cable into the bracket and connect the cable to the shift lever.
CAUTION: Be careful not to nick or damage the tailshaft housing seal during driveshaft installation.
Lightly coat the slip yoke with Motorcraft Premium Long Life Grease XG-1-C (or -K, equivalent meeting Ford specification ESA-M1C75-B).
Remove the plug and install the driveshaft. Rotate the driveshaft and align it with the index mark made during removal. Install the bolts. Tighten them to 83-118 Nm (61-87 lb-ft).
Remove the jack stands.
Lower the vehicle.
From inside the vehicle, place the selector lever in the DRIVE or OVERDRIVE position. Hang a three-pound weight on the lever.
Raise the vehicle.
Remove the shift cable from the transmission lever ball stud. Pull down the lock tab on the shift cable body. Position the manual control lever in the DRIVE or OVERDRIVE position (three detents from the front-most lever position with the first position counted as one). Connect the cable end fitting to the lever ball stud. Push up on the lock tab to lock the cable in the correctly adjusted position.
Lower the vehicle.
Remove the three-pound weight.
Separate the transmission fluid indicator from the tube. Inspect the O-ring and replace it if necessary. Install the transmission fluid indicator tube, ground wire, and nut. Tighten the nut to 16-24 Nm (12-18 lb-ft).
Connect the battery ground cable.
Fill the transmission to the proper level with Motorcraft MERCON® Multi-Purpose Automatic Transmission Fluid XT-2-QDX (or MERCON® equivalent) and install the indicator.
Check the operation of the transmission.