![]() CAUTION: Do not attempt to pry tabs with pry bar or screwdriver.
CAUTION: Do not attempt to pry tabs with pry bar or screwdriver.
Remove transmission range (TR) sensor connector by pushing center tab on connector and pulling on connector.
Section 07-01A: Transmission, Automatic, E4OD | 1996 All F-Series and Bronco with E4OD Automatic Transmission Workshop Manual |
| Description | Tool Number |
|---|---|
| Torque Converter Handles | T81P-7902-C |
Removal
Disconnect battery ground cable (14301) at the battery.
Remove fluid level indicator (7A020).
Place transmission gearshift selector lever in NEUTRAL position.
Raise vehicle on a hoist and position suitable safety stands under vehicle.
Remove skid plate (4x4 vehicles).
On 4x4 models only, remove front driveshaft. Refer to Section 05-01.
Remove rear driveshaft. Refer to Section 05-01. On F-Super Duty vehicles, remove the transmission-mounted parking brake. Refer to Section 06-05 in the Body, Chassis Manual.
Disconnect shift cable, or linkage on F-Super Duty Motorhome. Refer to Section 07-05.
On 4x4 models only, (mechanical shift systems) remove shift linkage from transfer case shift lever. Refer to Section 07-05. Disconnect electrical connector at transfer case.
![]() CAUTION: Do not attempt to pry tabs with pry bar or screwdriver.
CAUTION: Do not attempt to pry tabs with pry bar or screwdriver.
Remove transmission range (TR) sensor connector by pushing center tab on connector and pulling on connector.
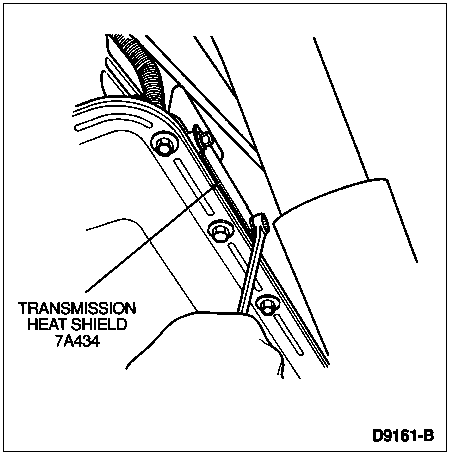
Loosen the two transmission heat shield bolts using an 8mm socket. Remove the transmission heat shield (7A434).
![]() CAUTION: Do not attempt to pry tab with pry bar or screwdriver.
CAUTION: Do not attempt to pry tab with pry bar or screwdriver.
Remove solenoid body assembly connector carefully by pushing on the center tab and pulling on the wire harness.
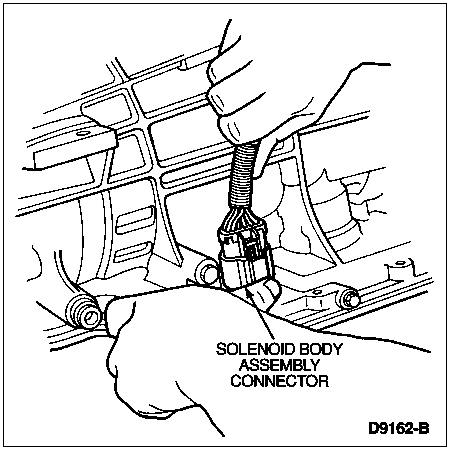
On 4x4 models only, remove four-wheel drive switch connector from transfer case. Use care not to overextend tabs.
Carefully pry wire harness locator from extension housing wire bracket.
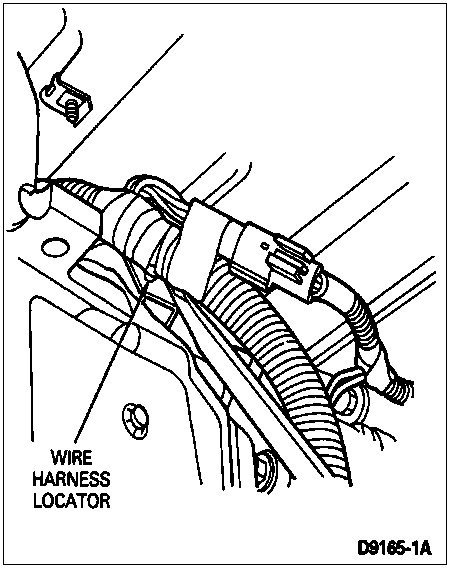
On 4x4 models only, remove wire harness locators from left side of transmission support crossmember (6A023).

Remove lower torque converter cover bolts using a 10mm socket and remove cover.
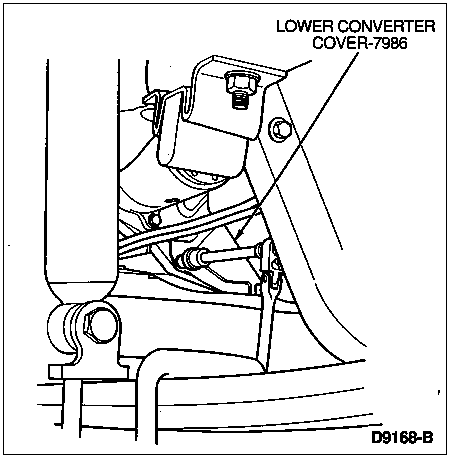
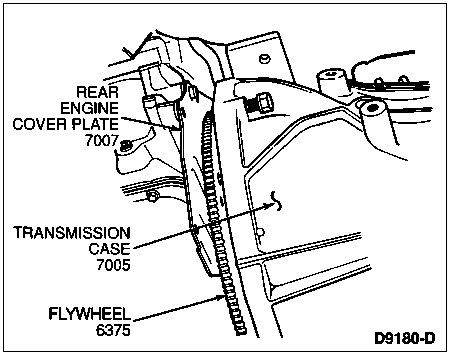
Remove rear engine cover plate bolts.
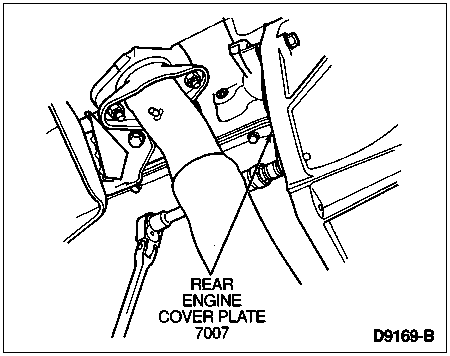
Remove starter motor (11001). Refer to Section 03-06A or Section 03-06B.
Remove converter housing access plug (7N171). Use a 15/16-inch socket to rotate crankshaft (6303) to gain access to the converter drain plug. Remove plug. Drain torque converter (7902).
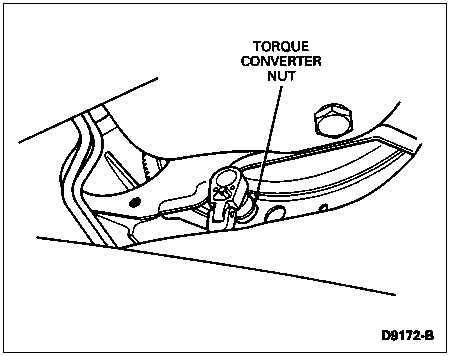
Rotate crankshaft bolt to gain access to converter nuts. Using a 9/16-inch socket, remove four (six for 7.3L) converter mounting nuts and discard.
Place Rotunda E4OD Transmission Jack Adapter 014-00763 or equivalent on universal transmission jack and position adapter as in following illustrations.
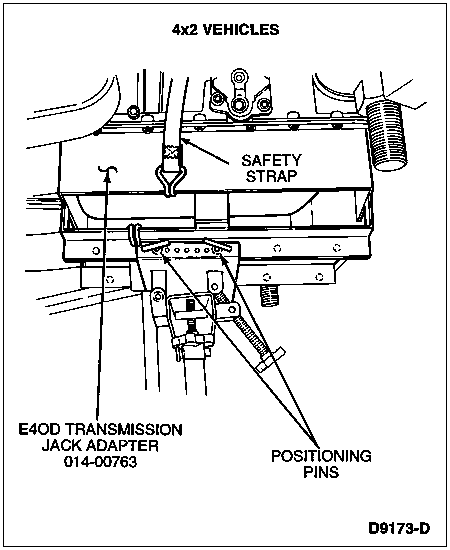
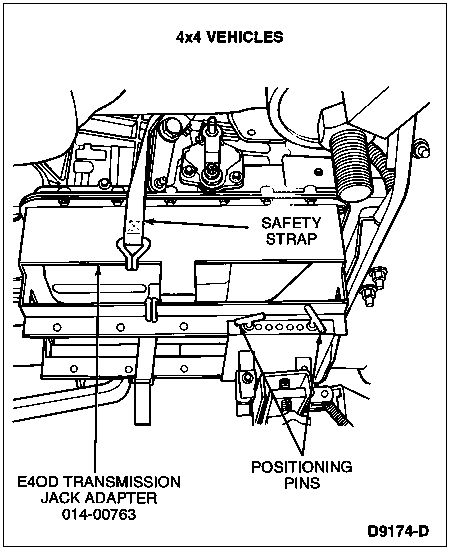
Use a safety strap to secure transmission.
NOTE: Transmission may have to be raised to gain adequate clearance to remove transmission support crossmember
Remove the two rear transmission mounting pad nuts using an 18mm socket. Remove rear engine support-to-frame bolts and remove transmission support crossmember from transmission.

| Item | Part Number | Description |
|---|---|---|
| 1 | 6096 | Rear Engine Support Bracket (RH) |
| 2 | 6A023 | Transmission Support Crossmember |
| 3 | 60091 | Insulator and Retainer |
| 4 | 390066 | Screw and Washer |
| 5 | 6096 | Rear Engine Support Bracket (LH) |
| 6 | N621945 | Nut and Washer |
| 7 | N802114 | Bolt |
| 8 | N800937 | Nut |
| A | — | Tighten to 81-108 Nm (60-80 Lb-Ft) for F-Series and Bronco. Tighten to 68-95 Nm (50-70 Lb-Ft) for F-Super Duty and Motorhome Applications. |
| B | — | Tighten to 60-95 Nm (44-70 Lb-Ft) |
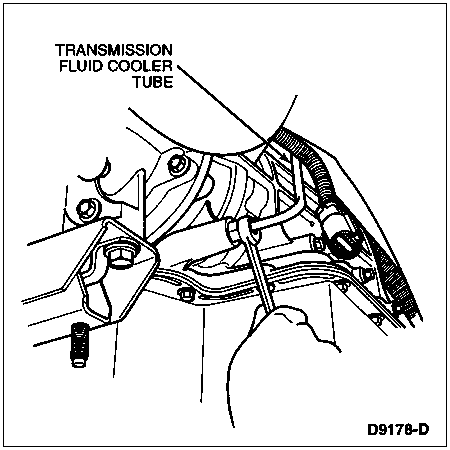
NOTE: Case connector fitting should be held with wrench to prevent it from moving when loosening tube nut.
Remove transmission fluid cooler tubes using a 1/2-inch flare nut wrench from transmission case. Cap transmission fluid cooler tubes and plug fittings at transmission. The F-Super Duty Motorhome Chassis requires the use of a 5/8-inch tube nut wrench.
Remove torque converter housing bolts.
Back out transmission assembly fromflywheel (6375) and gently lower while watching for any obstructions.
![]() CAUTION: Torque converter is very heavy.
CAUTION: Torque converter is very heavy.
NOTE: Fluid loss will occur when torque converter is removed.
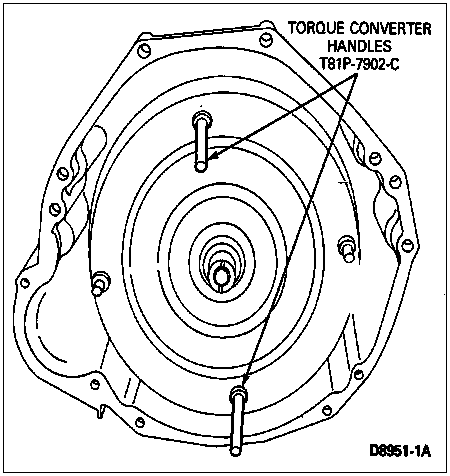
Install Torque Converter Handles T81P-7902-C ontorque converter with handles in the 6 and 12 o'clock positions. Carefully remove torque converter from transmission by pulling evenly on handles.
Remove fluid filler tube from fluid inlet short tube.
On 4x4 models only, remove transfer case vent hose from detent bracket. Refer to Section 07-07A, Section 07-07B or Section 07-07C.
On 4x4 models only, remove the transfer case from the transmission. Refer to Section 07-07A, Section 07-07B or Section 07-07C.