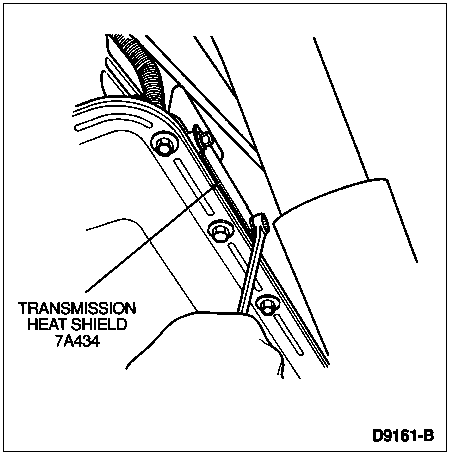
Loosen the two transmission heat shield bolts and remove the shield.

Section 07-01A: Transmission, Automatic, E4OD | 1996 All F-Series and Bronco with E4OD Automatic Transmission Workshop Manual |
Removal
Disconnect the battery ground cable from the battery.
Remove the fluid level indicator tube nut, ground wire, and tube.
Raise the vehicle.
Mark the relationship of the driveshaft and rear axle companion flange, so the driveshaft can be installed in the original position.
Remove the four bolts retaining the driveshaft to the rear axle companion flange. Disconnect the driveshaft from the rear axle and remove it from the vehicle.
Install a transmission plug into the tailshaft housing.
Disconnect the shift cable from the shift lever and shift cable bracket.
Loosen the two transmission heat shield bolts and remove the shield.

Disconnect the transmission harness locators, heated oxygen sensor (HO2S), E4OD solenoid body assembly, and transmission range (TR) sensor connectors. Position the harness aside.
Remove the starter motor heat shield and starter motor. Position the starter aside, using mechanic's wire.
NOTE: The case connector fittings must be held with a wrench to prevent them from turning when loosening the tube nuts.
Remove the transmission fluid cooler tubes from the transmission case. Cap the transmission fluid cooler and plug the fittings at the transmission.
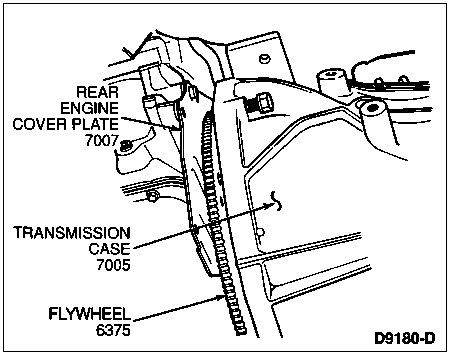
Remove the torque converter spacer plate-to-transmission bolt and housing access cover bolts. Remove the cover.
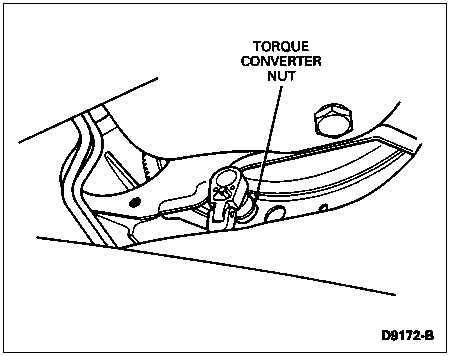
Rotate the torque converter. Remove and discard four converter-to-flexplate nuts.

Remove the transmission pan bolts and drain the transmission. Install the transmission pan, using the original gasket.
Support the engine.
![]() CAUTION: The adapter plate bolts must be installed as illustrated on the plate sticker (three pan bolts removed) and must be tightened to 14-16 Nm (10-12 lb-ft).
CAUTION: The adapter plate bolts must be installed as illustrated on the plate sticker (three pan bolts removed) and must be tightened to 14-16 Nm (10-12 lb-ft).
Place Rotunda E4OD Adapter 014-00306 or equivalent on a universal transmission jack, raise the adapter to the transmission, install the adapter plate bolts, and secure the safety strap to the transmission.
Remove the two rear transmission support insulator nuts and lift the transmission. Remove the nuts and bolts that retain the left and right rear crossmember support to the lower frame support bracket. Loosen the upper left and right support-to-frame retainers. Remove the crossmember.

| Item | Part Number | Description |
|---|---|---|
| 1 | 6096 | Rear Engine Support Bracket (RH) |
| 2 | 6A023 | Transmission Support Crossmember |
| 3 | 60091 | Insulator and Retainer |
| 4 | 390066 | Screw and Washer |
| 5 | 6096 | Rear Engine Support Bracket (LH) |
| 6 | N621945 | Nut and Washer |
| 7 | N802114 | Bolt |
| 8 | N800937 | Nut |
| A | — | Tighten to 68-95 Nm (50-70 Lb-Ft) |
| B | — | Tighten to 68-95 Nm (50-70 Lb-Ft) |
Slightly lower the transmission and remove six transmission-to-engine bolts.
![]() CAUTION: Make sure the torque converter separates from the flexplate and remains seated in the transmission. Do not allow the converter to tip forward; otherwise, it could fall out while lowering the transmission.
CAUTION: Make sure the torque converter separates from the flexplate and remains seated in the transmission. Do not allow the converter to tip forward; otherwise, it could fall out while lowering the transmission.
Separate the transmission from the engine and carefully lower the transmission while watching for any obstructions.
