Section 05-02D: Axle, Rear, Dana | 1996 F-Super Duty Workshop Manual |
Inspect differential case (4204) and drive pinion prior to removal from the rear axle assembly (4006). These inspections can find the cause of the concern and determine the resolution.
Wipe the lubricant from the internal working parts and visually inspect the parts for wear and/or damage.
Rotate the gears to check for any roughness, indicating damaged bearings or gears.
Check the teeth of ring gear and pinion for signs of scoring, abnormal wear or nicks/chips.
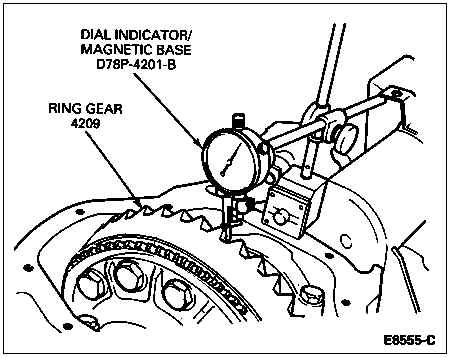
Set up Dial Indicator/Magnetic Base Tool D78P-4201-B or equivalent and check backlash and backface runout of ring gear and pinion.
Check ring gear and pinion backlash at three equally spaced points with dial indicator.
Backlash tolerance is 0.127-0.203mm (0.005-0.008 inch) and cannot vary more than 0.05mm (0.002 inch) between points checked.
To check backface runout of ring gear and pinion, mount Dial Indicator/Magnetic Base D78P-4201-B or equivalent on the carrier so the tip of the dial indicator contacts the backface of the ring gear and pinion. Backface runout should be no more than 0.101mm (0.004 inch). If more than 0.002 inch difference in backlash is measured at adjacent points, the total runout will be beyond specifications.