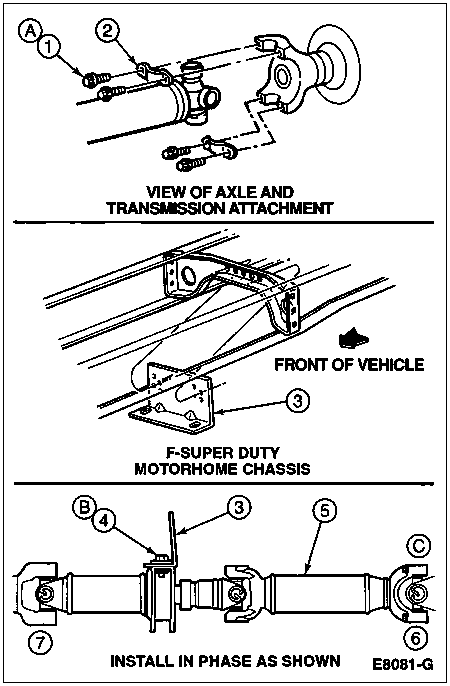
Connect the rear U-joints to the rear axle flange and tighten the bolts to 34-54 Nm (25-40 lb-ft). Make sure all driveshaft and coupling shaft yokes are properly in phase. Refer to the following illustration.
Driveshaft Installation, Two-Piece
| Item | Part Number | Description |
|---|---|---|
| 1 | 390880-S100 | Bolt |
| 2 | 4A254 | Driveshaft Universal Joint Spider Retainer |
| 3 | 4831 | Support Plate |
| 4 | 56761-S2 | Bolt |
| 5 | 4602 | Driveshaft |
| 6 | Ś | Axle End (Part of 4602) |
| 7 | Ś | Transmission End (Part of 4602) |
| A | Ś | Tighten to 34-54 Nm (25-40 Lb-Ft) |
| B | Ś | Tighten to 53-73 Nm (39-54 Lb-Ft) |
| C | Ś | 158-Inch and 178-Inch Wheelbase |
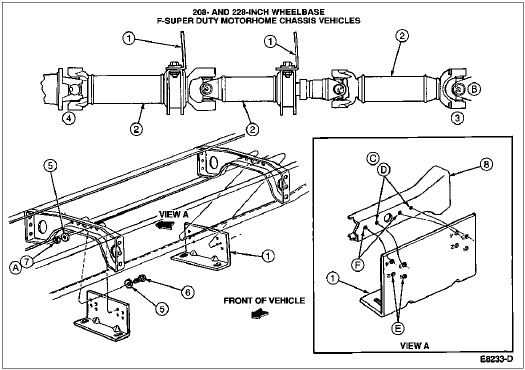
Driveshaft Installation, Three-Piece
| Item | Part Number | Description |
|---|---|---|
| 1 | 4831 | Support Plate |
| 2 | 4602 | Driveshaft |
| 3 | Ś | Axle End (Part of 4602) |
| 4 | Ś | Transmission End (Part of 4602) |
| 5 | N630088 | Washer |
| 6 | N605921 | Bolt |
| 7 | Ś | Nut |
| 8 | 5019 | Frame Crossmember |
| A | Ś | Tighten to 53-73 Nm (39-54 Lb-Ft) |
| B | Ś | 208-Inch Wheelbase |
| C | Ś | See Support Plate Position Chart for Holes to Mount to Crossmember |
| D | Ś | Align with Holes 2 and 4 |
| E | Ś | Numbers Are Stamped into Part |
| F | Ś | Align with Holes 1 and 3 |