Section 03-04A: Fuel Charging and Controls, 4.9L Engine | 1996 Vehicles Equipped with 4.9L SFI Engines Workshop Manual |
Description | Tool Number |
---|---|
Spring Lock Coupling Disconnect Tool | T81P-19623-G1 |
Spring Lock Coupling Disconnect Tool | T81P-19623-G2 |
Removal
Perform Pre-Service Procedures as described in Fuel Charging System in the Removal and Installation portion of this section.
Remove the upper intake manifold (9424). Refer to Section 03-01A.
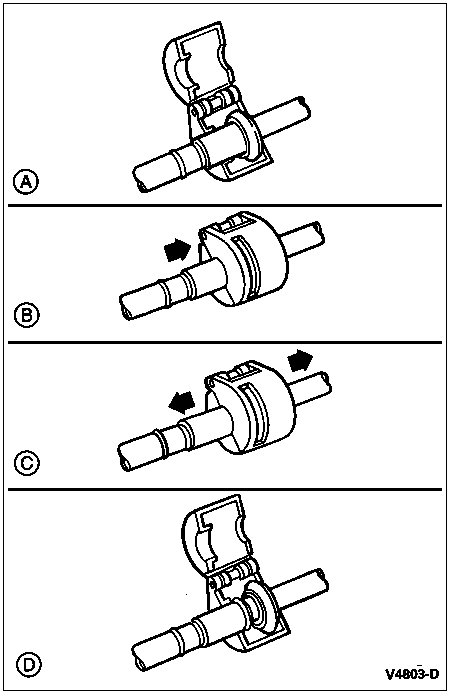
Disconnect fuel tube retaining clips.
WARNING: RELIEVE FUEL SYSTEM PRESSURE BEFORE DISCONNECTING COUPLING.
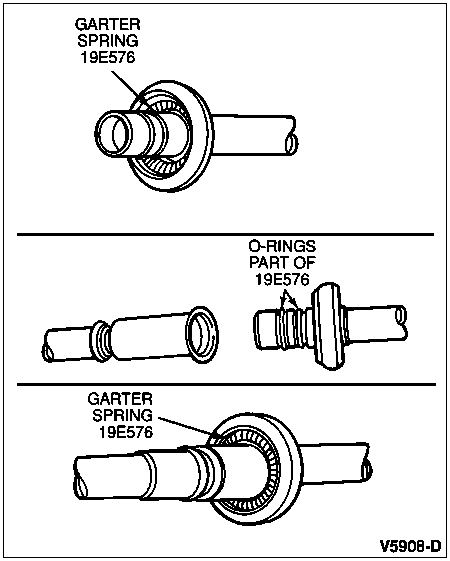
Using Spring Lock Coupling Disconnect Tool T81P-19623-G1 (3/8-inch) or T81P-19623-G2 (1/2-inch) or equivalents, disconnect fuel hoses at the fuel rail supply tube and fuel rail return tube.
Disconnect the vacuum line to the fuel pressure regulator (9C968).
Remove the strap surrounding the fuel injection supply manifold (9D280), fuel charging wiring (9D930), and the main vacuum harness.
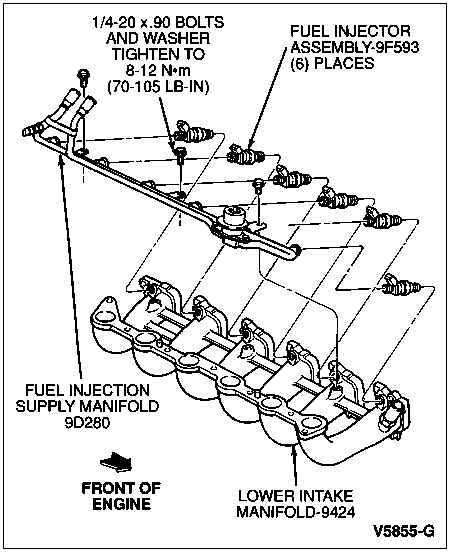
Remove the three fuel injection supply manifold retaining studs.
NOTE: Fuel injectors (9F593) will remain infuel injection supply manifold when removed.
Remove fuel injection supply manifold.
Grasp injector body and pull up while gently rocking fuel injector from side to side, to remove.
Installation
Make sure injector caps are clean and free of contamination.
Install the fuel injectors into the fuel injection supply manifold first to avoid damage to the O-rings.
Secure the fuel injection supply manifold using the three retaining bolts. Tighten to 8-12 Nm (70-105 lb-in).
Attach the vacuum line to the fuel pressure regulator.
Secure the main vacuum harness and the fuel charging wiring to the fuel injection supply manifold with a strap positioned between the No. 5 and No. 6 intake manifold runners.
Connect the fuel inlet and outlet tubes at the fuel injection supply manifold connections. Refer to the illustration.
Connect fuel tube retaining clips.
Install the upper intake manifold as described in Section 03-01A.
Perform Post-Service Procedures as described in Fuel Charging System in the Removal and Installation portion of this section.