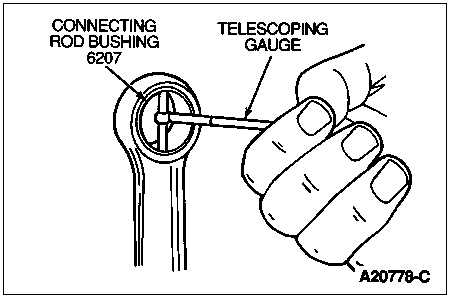
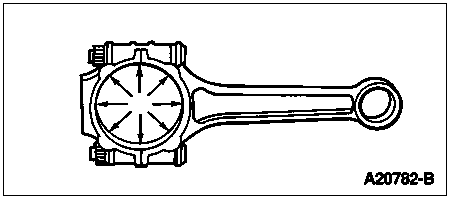
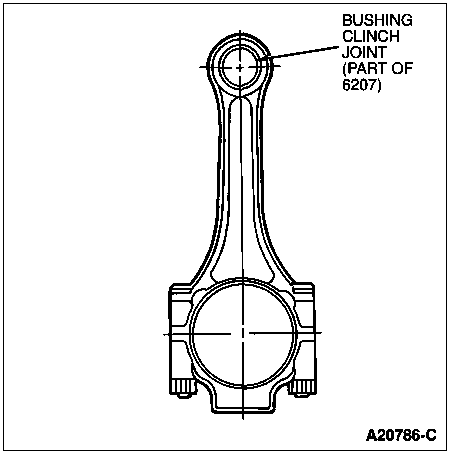
Measure the inside diameter of the connecting rod bushing (6207) using a telescoping gauge and a micrometer. If connecting rod bushings are out of specification, new connecting rod bushings must be installed.
Section 03-01D: Engine, Diesel, 7.3L | 1996 F-Series Workshop Manual |
| Description | Tool Number |
|---|---|
| Piston Pin Remover/Replacer | T68P-6135-A |
Cleaning
Remove the connecting rod bearings (6211) from the connecting rod (6200) and connecting rod cap. Identify each connecting rod bearing location if they are to be used again. Clean the connecting rod in solvent, including the rod bore and the back of the bearing inserts. Do not use a caustic cleaning solution. Blow out all passages with compressed air.
Inspection
Measure the inside diameter of the connecting rod bushing (6207) using a telescoping gauge and a micrometer. If connecting rod bushings are out of specification, new connecting rod bushings must be installed.
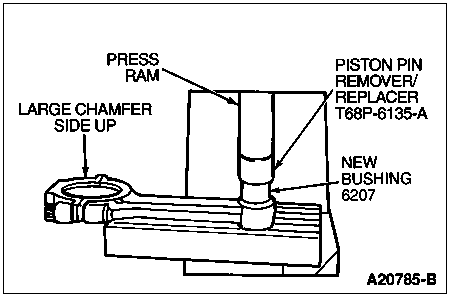
Remove any worn connecting rod bushing using Piston Pin Remover/Replacer T68P-6135-A.
Place the connecting rod under a hydraulic press in line with the properly sized hole on the support block and use Piston Pin Remover/Replacer T68P-6135-A to press out the connecting rod bushing.

Clean the connecting rod thoroughly and visually inspect for defects.
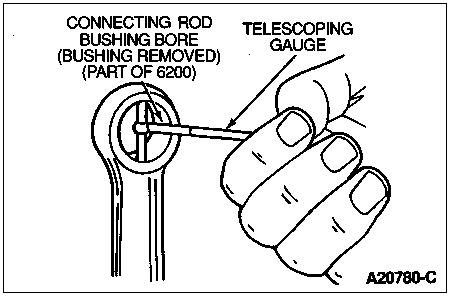
Using a telescoping gauge and a micrometer, check the connecting rod bushing bore diameter.
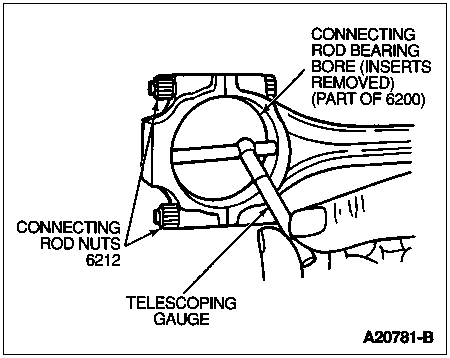
NOTE: Measure connecting rod bearing bore diameter with connecting rod nut tightened to specified torque.
Inspect the crankshaft end of the connecting rod as follows:
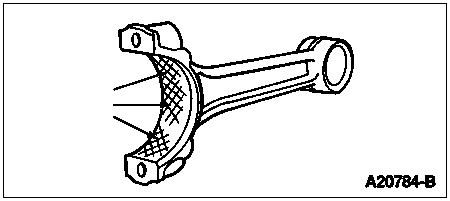
An engine component wear pattern can be identified and used to diagnose a problem. Following are common examples of connecting rod wear pattern diagnostic hints.
Install a new connecting rod bushing using Piston Pin Remover/Replacer T68P-6135-A as follows:
After the connecting rod bushing has been installed in the connecting rod, it must be honed to the proper inside diameter. Refer to Specifications at the end of this section.
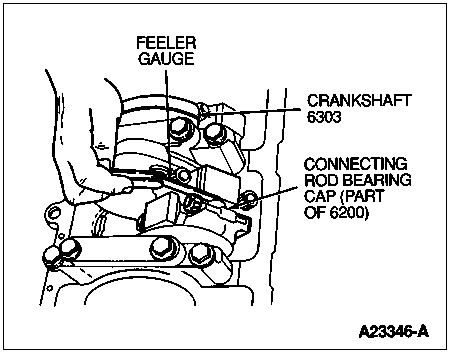
NOTE: The connecting rod end clearance must be checked to be certain that the specified clearance exists. Lack of clearance could indicate a damaged connecting rod or a connecting rod bearing out of position. Correct as required. Excessive clearance may require replacement of the crankshafts (6303) or crankshaft.
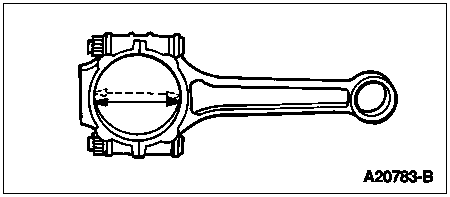
Check the connecting rod side clearance, using a feeler gauge.