Section 03-00: Engine, Service | 1996 All F-150, F-250, F-350, F-Super Duty and Bronco Vehicles Equipped with 4.9L, 5.0L, 5.8L or 7.5L Gasoline Engines, and 7.3L Diesel Engines Workshop Manual |
SERVICE PROCEDURES
Engine Oil Consumption, Excessive
The amount of oil an engine (6007) uses will vary with the way the vehicle is driven in addition to normal engine-to-engine variation.
Oil usage is normally greater during the first 16,000 km (10,000 miles) of service. As mileage increases, oil usage generally improves. Cars and light trucks in normal service should get at least 1448 km (900 miles) to 0.9L (1 qt.) after 16,000 km (10,000 miles) of service.
Vehicles used in heavy-duty operation (severe service) may result in greater oil usage. The following are examples of heavy-duty operation:
- High ambient temperatures
- Trailer towing applications
- Taxi cab applications
- Police service applications
- Severe loading applications
- Sustained high-speed operation
Engines need oil to lubricate the following internal components:
- Engine block cylinder walls
- Pistons and piston rings
- Intake and exhaust valve stems
- Intake and exhaust valve guides
- All internal engine components
When the pistons move downward, a thin film of oil is left on the cylinder walls. The thin film of oil is burned away on the firing stroke during combustion. If an engine burned a drop of oil during each firing stroke, oil consumption would be about one quart for every mile traveled. Fortunately modern engines use much less oil than this example. However, even efficient engines will use some oil or they would quickly wear out. Additionally, as the vehicle is operated, some oil is drawn into the combustion chambers past the intake and exhaust valve stem seals and burned.
Many different conditions can affect oil consumption rates. A partial list of those conditions includes:
- Operator driving habits
- Ambient temperature
- Quality and viscosity of the oil
- Vehicle load and driving terrain
Operation under certain conditions can create a false impression of excessive oil consumption. Most commonly, this happens when the vehicle has been operated for repeated short trips at low ambient temperatures. Under these conditions, substantial amounts of condensed water and fuel can build up in the oil. If the vehicle is then run for a significant time at highway speeds and/or with heavy loads, much of the accumulated water and fuel can be removed by the engine ventilation system. Removing the water and fuel in a relatively short time will often create the appearance of an excessive consumption rate of the customer. In this situation, the customer could be assured that these events are normal for the conditions noted. The customer might also be advised to change oil and filter more frequently, especially prior to starting a long trip in cold weather if unduly concerned about this condition.
Make sure the selected engine oil meets the recommended API performance category "SG" and SAE viscosity grade as shown in the Vehicle Owner Guide. It is also important that the engine oil is changed at the intervals specified for the typical operating conditions. Refer to Section 00-03.
Oil Consumption Test
Use the following procedure to find the source of excessive internal oil consumption.
Determine what the customer considers excessive oil consumption to be. Note vehicle mileage and the following observations:
- How many miles are typically driven per quart of oil used?
- How is the vehicle being used (e.g., sustained high speed operation, heavy loads, trailer towing, high ambient temperature, etc.)?
- What does the customer expect normal oil consumption to be?
Verify that the engine has no external oil leak as described under Engine Oil Leaks in the Service Procedures portion of this section.
Verify that the engine has the proper oil level dipstick (6750) by comparing the part number stamped on it against the Ford Master Parts Catalog. Verify that the oil level dipstick and oil level indicator tube (6754) are unmodified and in good condition. Verify that the oil level indicator tube is properly seated in the block or oil pan, and the dipstick seats properly in the oil level indicator tube.
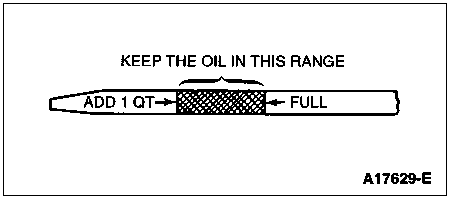
Verify that the engine is not being run in an overfilled condition. Check the oil level at least five minutes after a hot shutdown with the vehicle parked in a level area. Under no circumstances should the oil level be above the letter F in the word FULL. If a significant overfill is indicated, perform Steps 5a through 5d to verify the dipstick calibration. If the dipstick calibration checks OK, instruct the customer to avoid overfilling the engine and return the vehicle to service. To verify the vehicle's actual oil consumption, perform Steps 5e and 5f only after the oil level dipstick has been calibrated.
Perform engine oil consumption test as follows:
- Drain engine oil. Remove and replace oil filter. Using 0.9L (1 quart) less than recommended, refill crankcase with recommended quality of oil.
- Run the engine for three minutes (ten minutes if cold), then turn engine off. Allow oil to drain into the oil pan for an additional five minutes (vehicle should be on level ground).
- Remove oil dipstick and wipe clean. Do not wipe with anything contaminated with silicone compounds. Reinstall dipstick being sure to seat the dipstick firmly in the oil level indicator tube. Remove the dipstick and scribe a mark on the back (unmarked) surface at the indicated oil level. This should be about the same level as the ADD mark on the face of the dipstick.
- Add 0.9L (1 quart) of oil. Restart the engine and allow it to idle for at least two minutes. Shut down and allow oil to drain back for at least five minutes. Mark the dipstick using the procedure above. This level may range from slightly below the top of the crosshatched area to slightly below the letter F in FULL.
- Instruct the customer to drive the vehicle as usual and perform the following steps:
- Check the oil level regularly at intervals of 161 to 241 km (100 to 150 miles).
- Return to the service facility when the oil level drops below the lower (ADD) mark scribed on the dipstick by the technician.
- In an emergency, add only full litres (quarts) of the same oil and note the mileage at which the oil was added.
- Check the oil level under the same conditions as in Steps 5c and 5d, reading the back of the oil level dipstick where the scribe marks are located.
- Measure the distance from the oil level to the upper scribe mark on the oil level dipstick and record.
- Measure the distance between the two scribe marks and record.
- Divide the first measurement by the second. Add one to this total for every quart added by the customer as instructed in Step 5e.
- Divide the distance driven during the oil test by the result. This quantity is the approximate oil consumption rate in miles per quart (MPQ).
- If the calculated oil consumption rate is unacceptable, proceed to Step 6.
Check PCV valve system. Make sure system is not plugged.
Check for plugged oil drain-back holes in cylinder heads (6049) and cylinder block (6010).
If condition still exists, perform a cylinder compression test as described in this section, and/or perform a cylinder leak detection test with Rotunda Pressurization Kit 014-00705 or equivalent. This can be helpful in determining source of oil consumption, i.e., valves, piston rings, etc.
Check valve guides (6510) for excessive guide clearance. Replace all valve stem/guide seals after correct valve guide clearance has been verified.
NOTE: After checking for worn parts, if it is determined parts should be replaced, make sure correct replacement parts are used.
Worn or damaged internal engine components can cause excessive oil consumption. Small deposits of oil on tip of spark plugs (12405) can be a clue to internal oil consumption. If internal oil consumption still persists, proceed as follows:
- Remove engine from vehicle and place it on an engine work stand. Remove intake manifold(s), cylinder heads, oil pan (6675) and oil pump (6600). Refer to Section 03-01A (4.9L SFI), Section 03-01B (5.0L and 5.8L MFI), Section 03-01C (7.5L MFI) or Section 03-01D (7.3L diesel).
- Check piston ring clearance, ring gap and ring orientation as outlined in this section. Service as required.
- Check for excessive bearing clearance as outlined in this section. Service as required.
Perform Step 5 again to confirm oil consumption concern has been resolved.
Oil Pressure Test
SPECIAL SERVICE TOOL(S) REQUIRED| Description | Tool Number |
|---|
| Engine Oil Pressure Gauge | T73L-6600-A |
Disconnect and remove the oil pressure sensor (9278) from the engine.
Connect an Engine Oil Pressure Gauge T73L-6600-A and Transmission Test Adapter D87C-77000-A, or equivalent, to the oil pressure sender screw port.
Run the engine until normal operating temperature is reached.
Run the engine at 3,000 rpm and record the gauge reading.
The oil pressure should be: 392-490 kPa (57-71 psi) at 3,000 rpm.
If the pressure is not within specification, check the following possible sources:
- Insufficient oil
- Oil leakage
- Worn or damaged oil pump
- Clogged oil pump screen cover and tube (6622)
- Excessive main bearing clearance
- Excessive connecting rod bearing clearance