Follow removal procedures in reverse order. Tighten cable and handle assembly screws to 3-4 Nm (27-35 lb-in). Adjust hood latch as described in this section and tighten screws to 22-34 Nm (16-25 lb-ft).
Hood Latch and Cable Assembly, F-150, F-250, F-350 and Bronco
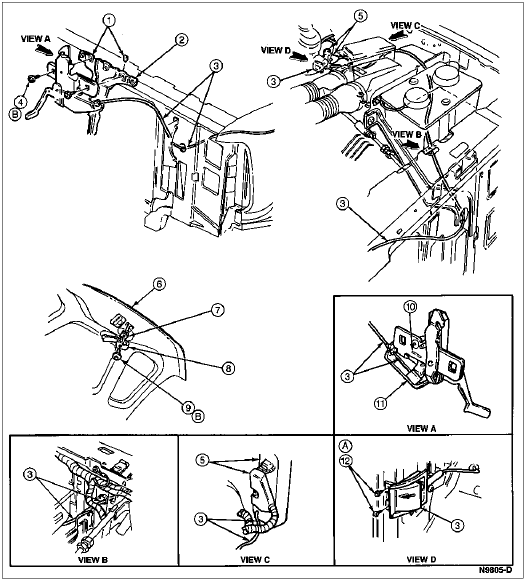
| Item | Part Number | Description |
|---|---|---|
| 1 | N804222-S100 | U-Nut |
| 2 | 16747 | Hood Latch Support Brace |
| 3 | 16916 | Hood Latch Control Handle and Cable |
| 4 | N803878-S307 | Screw and Washer |
| 5 | 12A650 | Powertrain Control Module |
| 6 | 16612 | Hood |
| 7 | N623333-S100 | U-Nut |
| 8 | 16C644 | Hood Assist Spring |
| 9 | N606688-S43B | Screw and Washer |
| 10 | 16907 | Hood Latch Control Clip |
| 11 | 16700 | Hood Latch |
| 12 | N802141-S58 | Screw and Washer |
| A | Ś | Tighten to 3-4 Nm (24-32 Lb-In) |
| B | Ś | Tighten to 22-34 Nm (16-25 Lb-Ft) |